
Chicken a la king
Chicken a la king
Chicken à la King is a true classic of "hotel cooking" that gained immense popularity throughout the 20th century. While it sounds regal, it has no official ties to any royal family—it is simply a luxurious, creamy, and comforting dish that became a staple of American dining.The History & MysteryThe origins of the dish are highly debated, with several hotels and chefs claiming credit in the late 19th century: The Brighton Beach Hotel (New York): A widely cited story suggests that Chef George Greenwald created it in the 1890s and named it after one of his patrons, E. Clarke King II. The Bellevue Hotel (Philadelphia): A 1915 New York Times obituary for a cook named William "Bill" King claimed he was the true inventor. Delmonico’s (New York): Another theory points to the famous restaurant Delmonico’s in the 1880s, suggesting it was inspired by a customer named Foxhall P. Keene (the son of a famous horse breeder), which is why it was sometimes referred to as Chicken à la Keene. Regardless of its true inventor, it became a mid-century sensation, often appearing at weddings and club dinners. By the 1950s and 60s, it was so ubiquitous that writer Calvin Trillin joked that the government must have been hoarding it in secret silos.
Ingredients
- 3 cups Cooked chicken Cubed
- 8 Oz Mushrooms Sliced
- 1 Onion Diced
- 1 clove Minced garlic
- 5 tbsp butter
- 1/3 cup plain flour
- 2 cups milk
- 1 cup cream
- 1 cup chicken stock
- 1/2 cup sciced pimentos
Instructions
- Sauté: Melt butter in a large pan and sauté the mushrooms and onions until soft.
- Roux: Sprinkle the flour over the vegetables and stir for 2 minutes to cook out the raw flour taste.
- Thicken: Gradually whisk in the chicken broth and half-and-half, stirring constantly until the sauce thickens into a glossy, smooth cream.
- Combine: Add the cooked chicken, peas, and pimentos.
- Simmer gently until everything is heated through.
- Finish: Stir in the sherry and seasonings.
- Serve: Traditionally served over toast points, puff pastry shells, or buttered biscuits.
Video
Notes
- The “Convenience” Shift: By the mid-20th century, the dish evolved to accommodate the “convenience” trend, with many households using canned cream soups and canned chicken to speed up the process.
- Flexible Starch: While toast points are the traditional “Old School” delivery method, it is now commonly served over egg noodles, rice, or inside vol-au-vent (puff pastry shells).
- Name Evolution: It is very likely that the name simply shifted from “à la Keene” (referring to the patron) to “à la King” because it sounded more sophisticated and regal to the public ear.
- Vegetarian Potential: Because the sauce is so flavorful, it is quite easy to adapt into a vegetarian version by substituting the chicken for extra mushrooms, cauliflower, or even chickpeas.

Crunchy Picalilli
Crunchy Picalilli
Bright, punchy, and aggressively neon-yellow, piccalilli is one of Britain’s most distinctive condiments. It is an absolute powerhouse on a cold meat platter or a ploughman’s lunch, designed specifically to cut through the richness of cheddar, pork pies, and cold ham.But behind its eccentric British identity lies a fascinating story of empire, global spice routes, and a 300-year-old attempt to mimic Eastern cooking.
A Bite-Sized History
1. The British Attempt at an Indian Pickle
The story of piccalilli begins in the late 17th and early 18th centuries, as the East India Company began importing exotic, heavily spiced mango pickles from India. British palates fell in love with these vibrant, punchy flavours, but importing them was incredibly expensive.British housekeepers and cooks decided to recreate them using accessible, crunchy homegrown vegetables—like cauliflower, onions, gherkins, and radish pods—combined with imported spices.2. The Earliest Recipes
The earliest known mention of it appears in 1694 under the name "Milo-Leila" (or Mango-Lila) in a recipe book by Anne Blencowe.By the mid-18th century, it had evolved into "Indian Pickle." The legendary Hannah Glasse included a recipe for it in her famous 1747 book The Art of Cookery Made Plain and Easy. By the time the 19th century rolled around, the name had somehow mutated into the quirky word "Piccalillo" or "Piccalilli."5 Fascinating Facts About Piccalilli
The Secret to the Neon Yellow Color: That unmistakable, glowing yellow hue comes entirely from turmeric and mustard powder. Originally, British cooks used turmeric purely to mimic the golden, exotic look of authentic Indian mango pickles.The Science of the Crunch: True British piccalilli is famous for the audible "snap" of its vegetables. To achieve this, the raw, chopped vegetables (traditionally cauliflower florets, small onions, and cucumbers) are salted heavily for 24 hours before pickling. The salt draws out the excess water via osmosis, hardening the cell walls of the vegetables so they stay crisp and crunchy even after months of sitting in acidic vinegar.The Thickener Trick: Unlike standard vinegary pickles, piccalilli has a thick, glossy sauce that clings to the vegetables. This texture is achieved by mixing the spices with flour (or cornflour) and boiling it with vinegar and sugar to create a spiced gravy before folding in the salted vegetables.The American Cousin is Completely Different: If you order "piccalilli" in the United States, you won’t get a thick, bright-yellow cauliflower pickle. The American version (particularly popular in Chicago on hot dogs) is green. It is a sweet relish made primarily from finely chopped green tomatoes, cabbage, and bell peppers, with much less emphasis on turmeric and mustard.A Staple of the Industrial Working Class: During the Victorian era and the 20th century, commercial versions by brands like Haywards and Crosse & Blackwell became staples in industrial towns across the UK. It was an incredibly cheap way to inject immense flavour into a monotonous diet of plain bread, cheap cold cuts, and potatoes.The Maturation Rule: A freshly made jar of piccalilli is incredibly sharp and aggressive. It needs to sit in a dark cupboard for a minimum of 4 to 6 weeks. Over time, the harshness of the vinegar softens, the sugar mellows, and the spices infuse deep into the cauliflower cores, turning it into a complex, beautifully balanced preserve. Servings 3 Jars
Equipment
- 3 Storage Jars with Sealable lid
Ingredients
- 50 g Fine Salt
- 30 g Cornflour
- 10 g Ground tumeric
- 10 g English mustard powder
- 15 g Yellow mustard seeds
- 1 tsp Crushed cumin seeds
- 1 tsp Crushed coriander seeds
- 600 ml Cider vinegar
- 150 g Granulated sugar
- 1 Kg washed, peeled vegetables – select 5 or 6 from the following: cauliflower or romanesco cauliflower; green beans; cucumbers; courgettes; green or yellow tomatoes; tomatilloes; carrots; small silver-skinned onions or shallots; peppers; nasturtium seed pods
Instructions
Day 1
- Chop all your vegetables into small, uniform pieces. Remember, you want to fit a mixture of vegetables on a single forkful, so keep the cauliflower florets tiny.
- Place all the chopped vegetables into a large glass or ceramic bowl.
- Sprinkle the 3 tablespoons of sea salt over the veg and toss thoroughly with your hands to ensure everything is coated.
- Cover the bowl with a clean tea towel and leave it on the counter for 24 hours.
Day 2
- After 24 hours, you'll see a lot of liquid at the bottom of the bowl. Tip the vegetables into a colander and rinse them thoroughly under cold running water to wash away the excess salt. Drain them very well, then pat them dry with a clean tea towel.
- In a small bowl, combine the cornflour, mustard powder, turmeric, ginger, and cumin. Pour in about 50ml of the vinegar and whisk until it forms a smooth, lump-free paste.
- Pour the remaining vinegar, the sugar, and the mustard seeds into a large, non-reactive saucepan (stainless steel or enameled, not aluminum). Bring to a boil until the sugar dissolves. Drizzle in the spice paste, whisking constantly, and simmer gently for 3 to 4 minutes until the sauce thickens into a glossy, smooth, bright yellow gravy
- Remove the saucepan from the heat. Tip the rinsed, dried vegetables straight into the hot yellow sauce. Stir thoroughly to ensure every single floret and onion piece is completely coated.
- Spoon the hot piccalilli into warm, sterilized glass jars, ensuring there are no large air pockets. Seal immediately with vinegar-proof lids.
The Hardest Part (Maturation): Resist the urge to open a jar immediately. Fresh piccalilli tastes incredibly harsh and vinegary. Leave the jars in a cool, dark cupboard for at least 4 to 6 weeks. During this time, the sharp edges of the vinegar soften, the sugar mellows, and the spices mature into that classic, beautifully balanced British tang. Once opened, keep it in the fridge.
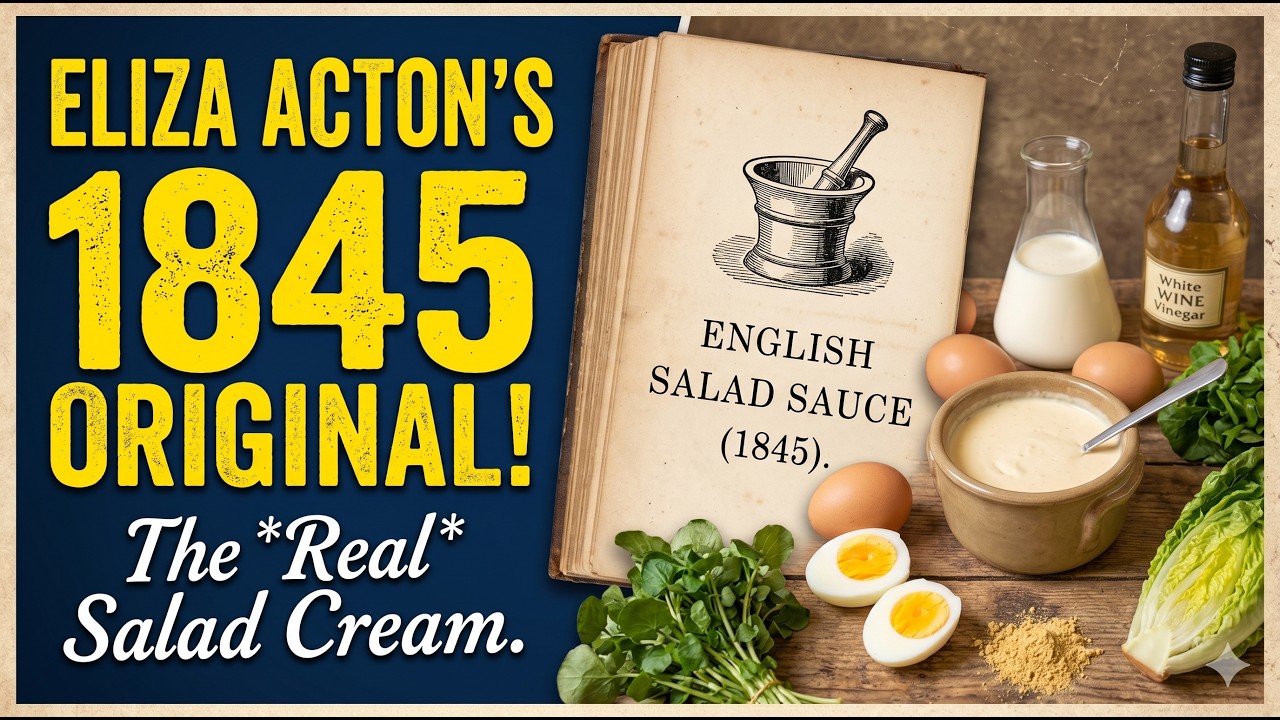
Eliza Acton’s Salad Cream
Eliza Acton’s Salad Cream
Long before salad cream came out of a mass-produced plastic bottle, it was known in the 19th century as "English Salad Sauce." In her ground-breaking 1845 masterpiece, Modern Cookery for Private Families, Eliza Acton recorded a luxurious, incredibly smooth version that uses real double cream rather than vegetable oil. Unlike mayonnaise, which can easily split, this cream-based emulsion is incredibly forgiving and delivers a lush, velvet texture with a gentle vinegary tang. Here is Eliza Acton's original 1845 recipe adapted into a straightforward, modern kitchen format.
Ingredients
- 3 Hard boiled egg yolks
- 150 ml Double cream
- 2 tbsp Tarragon or white wine vinegar
- 1 tsp English mustard powder
- 1/2 tsp Caster sugar
- 1 pinch salt
- 1 pinch Cayenne pepper
Instructions
- Place the eggs in a small saucepan, cover with cold water, and bring to a simmer. Cook for 10 minutes to ensure the yolks are completely firm. Drain immediately and submerge them in ice-cold water to cool.
- Peel the cooled eggs and separate the whites from the yolks. (You can save the whites to slice up into your final salad). Place the hard-boiled yolks into a medium mixing bowl.
- Add the mustard powder, caster sugar, salt, and cayenne pepper to the yolks. Using the back of a sturdy spoon or a small fork, mash and cream everything together vigorously until it forms a perfectly smooth, lump-free paste.
- Pour in the double cream a little bit at a time, whisking constantly with a balloon whisk. Ensure each splash is fully smooth before adding the next. The mixture will begin to look rich and velvety.
- Slowly drizzle in the vinegar while continuing to whisk. The acid in the vinegar will react with the cream and the egg yolks, naturally thickening the dressing into a gorgeous, spoonable sauce.
Video
Notes
Give the sauce a final taste—adjust the salt or add a tiny splash more vinegar if you prefer a sharper punch. Transfer it to a small jug and serve it alongside a crisp summer salad of heritage butterhead lettuce, sliced radishes, and boiled eggs.
Storage Tip: Cover it tightly and store it in the fridge. Because it uses double cream, it won’t separate like oil-based dressings, and it will keep beautifully for 3 to 4 days.
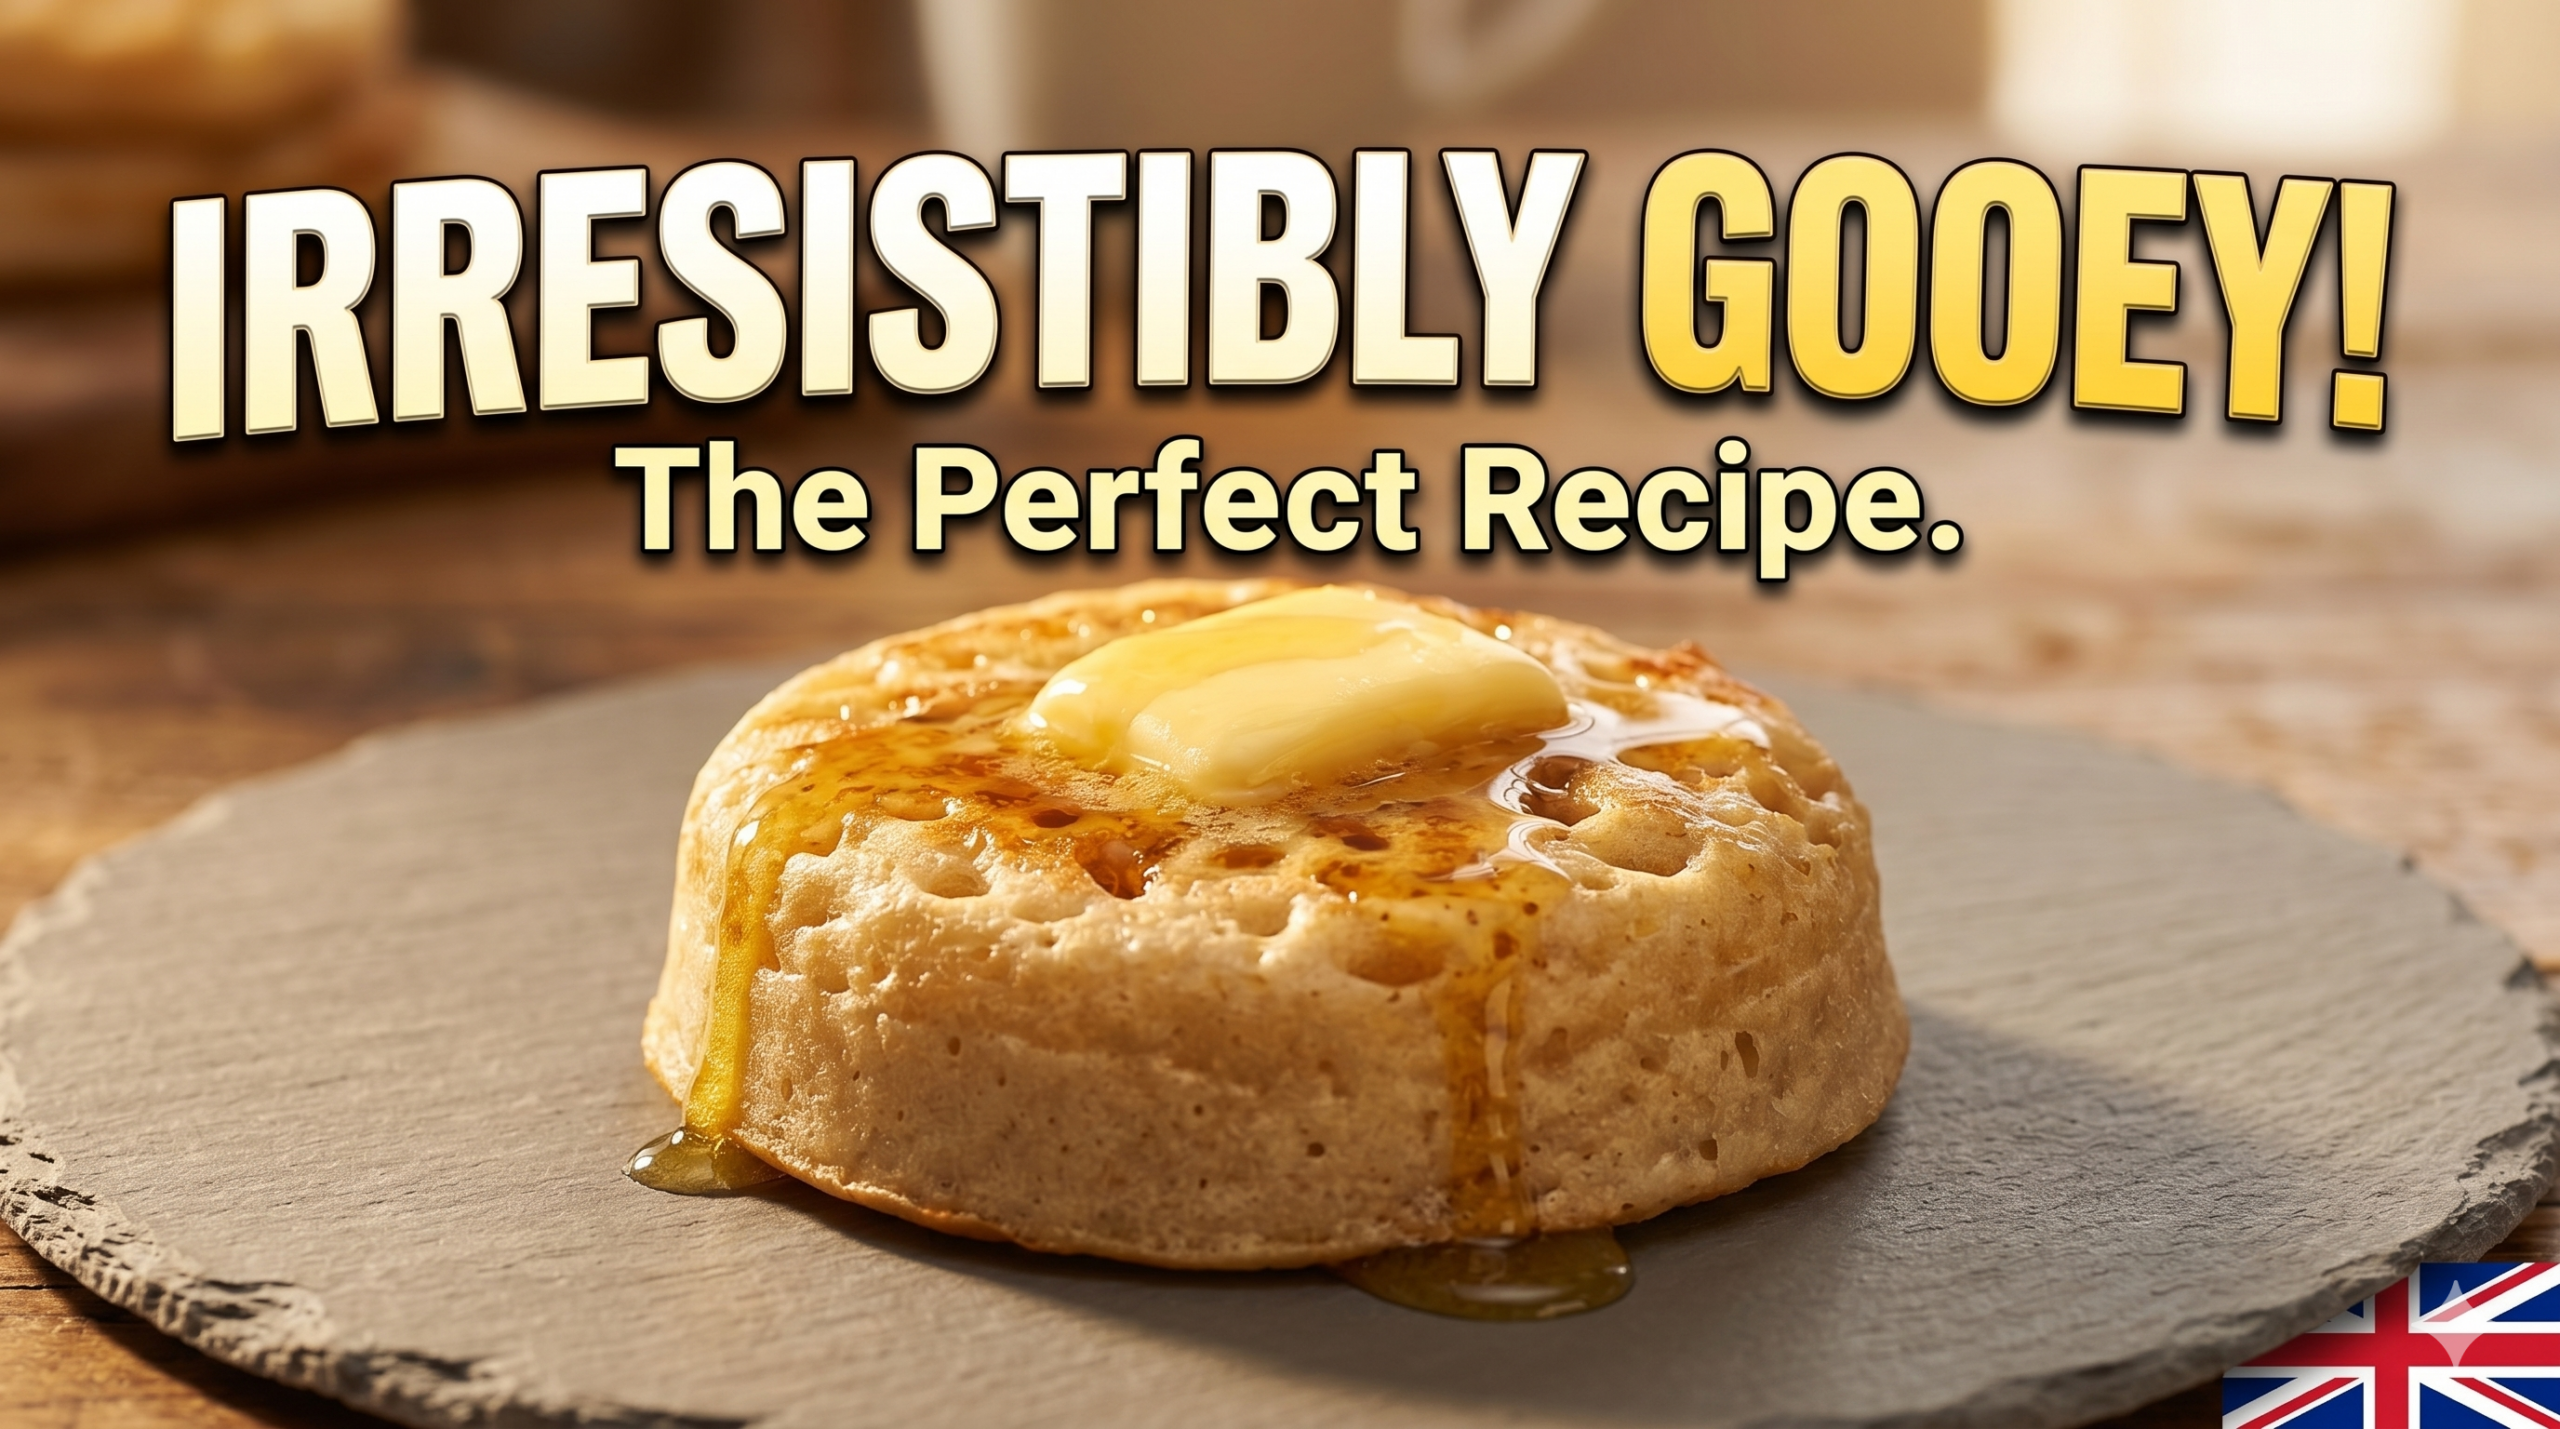
Crumpets
Crumpets
The humble crumpet is an absolute pillar of British teatime. It is a unique hybrid of a pancake and a yeast bread, loved entirely for its spongy texture and its uncanny ability to hold its own weight in melted butter.But the perfectly round, hole-filled crumpet we know today took centuries of evolution to get here.
A Bite-Sized History
1. The Early Days: Flat and Hard
The word "crumpet" likely comes from the old English word crompid (meaning curved or bent) or the Celtic crempog (a type of thin pancake). The earliest versions, dating back to the 14th century, weren't the fluffy, spongy rounds we eat today. They were flat, hard griddle cakes made from flour, milk, and eggs, cooked on a hot stone or a bakestone.2. The Victorian Evolution: The Magic of Yeast
It wasn't until the Victorian era that the crumpet underwent its biggest transformation. Victorian bakers began experimenting with adding yeast to the loose batter, alongside a vital addition: bicarbonate of soda.The chemical reaction from the bicarb created gas bubbles that rose through the thick batter as it cooked, creating the signature vertical tunnels. To stop the loose batter from spreading into a messy pancake across the hot griddle, bakers began cooking them inside metal rings—and the modern crumpet was officially born.5 Fascinating Facts About the Crumpet
The Bottom is Smooth, the Top is Hole-y: Unlike English muffins, which are split in half and toasted on both sides, crumpets are only cooked on one side during the manufacturing process. The bottom remains smooth and sealed, while the top pops with bubbles. When you toast a crumpet, you are essentially finishing the cooking process and crisping up the base and edges.The Anatomy of a Perfect Pour: The holes aren't just a byproduct; they are the entire point. In the food industry, these are referred to as the crumpet's "chimneys." They act as a capillary system, drawing melted butter straight down from the top surface into the core of the dough without letting it leak straight through the sealed bottom.Crumpets vs. Pikelets: In regions like Lancashire, Yorkshire, and the Midlands, you will often find pikelets. Historically, a pikelet is simply a crumpet made without the containment of a metal ring. The batter is dropped straight onto the griddle, resulting in a thinner, wider, more free-form pancake with holes, which is slightly heavier but just as delicious.The "Crumpet Man" of London: In the 19th and early 20th centuries, crumpets were street food. "Crumpet men" walked the streets of British towns and cities during the winter months, wearing large wooden trays on their heads loaded with fresh crumpets and muffins, ringing a handbell to summon hungry households to their doorsteps.The Ultimate War-Time Comfort: During the Blitz in World War II, crumpets became a symbol of resilience. Because they required very simple ingredients (flour, water/milk, yeast, salt), they could still be made during strict rationing, providing a rare, comforting treat to families huddled around coal fires.The Golden Rule of Eating a Crumpet: It must be toasted until the rim is distinctly crunchy, and it requires far more butter than you think is socially acceptable. It should essentially weep butter when bitten.Ingredients
- 75 g Plain flour
- 75 g Strong flour
- 200 ml Water
- 1 tsp Salt
- 1 tsp sugar
- 1 tsp Baking powder
- 1 tsp Dried yeast
- 1 tsp Water (for the yeast mix)
Instructions
- Whisk the base: Whisk the flour, water, and salt together for 2 minutes (or 1 minute on speed 5 with an electric mixer) to develop the gluten.
- Activate & combine: Dissolve the yeast in 1 tbsp of warm water. Add it to the bowl along with the sugar and baking powder, then whisk for another 30 seconds.
- The Proof: Cover the bowl and leave it in a warm place for 30 minutes to an hour until the surface is beautifully foamy.
Video
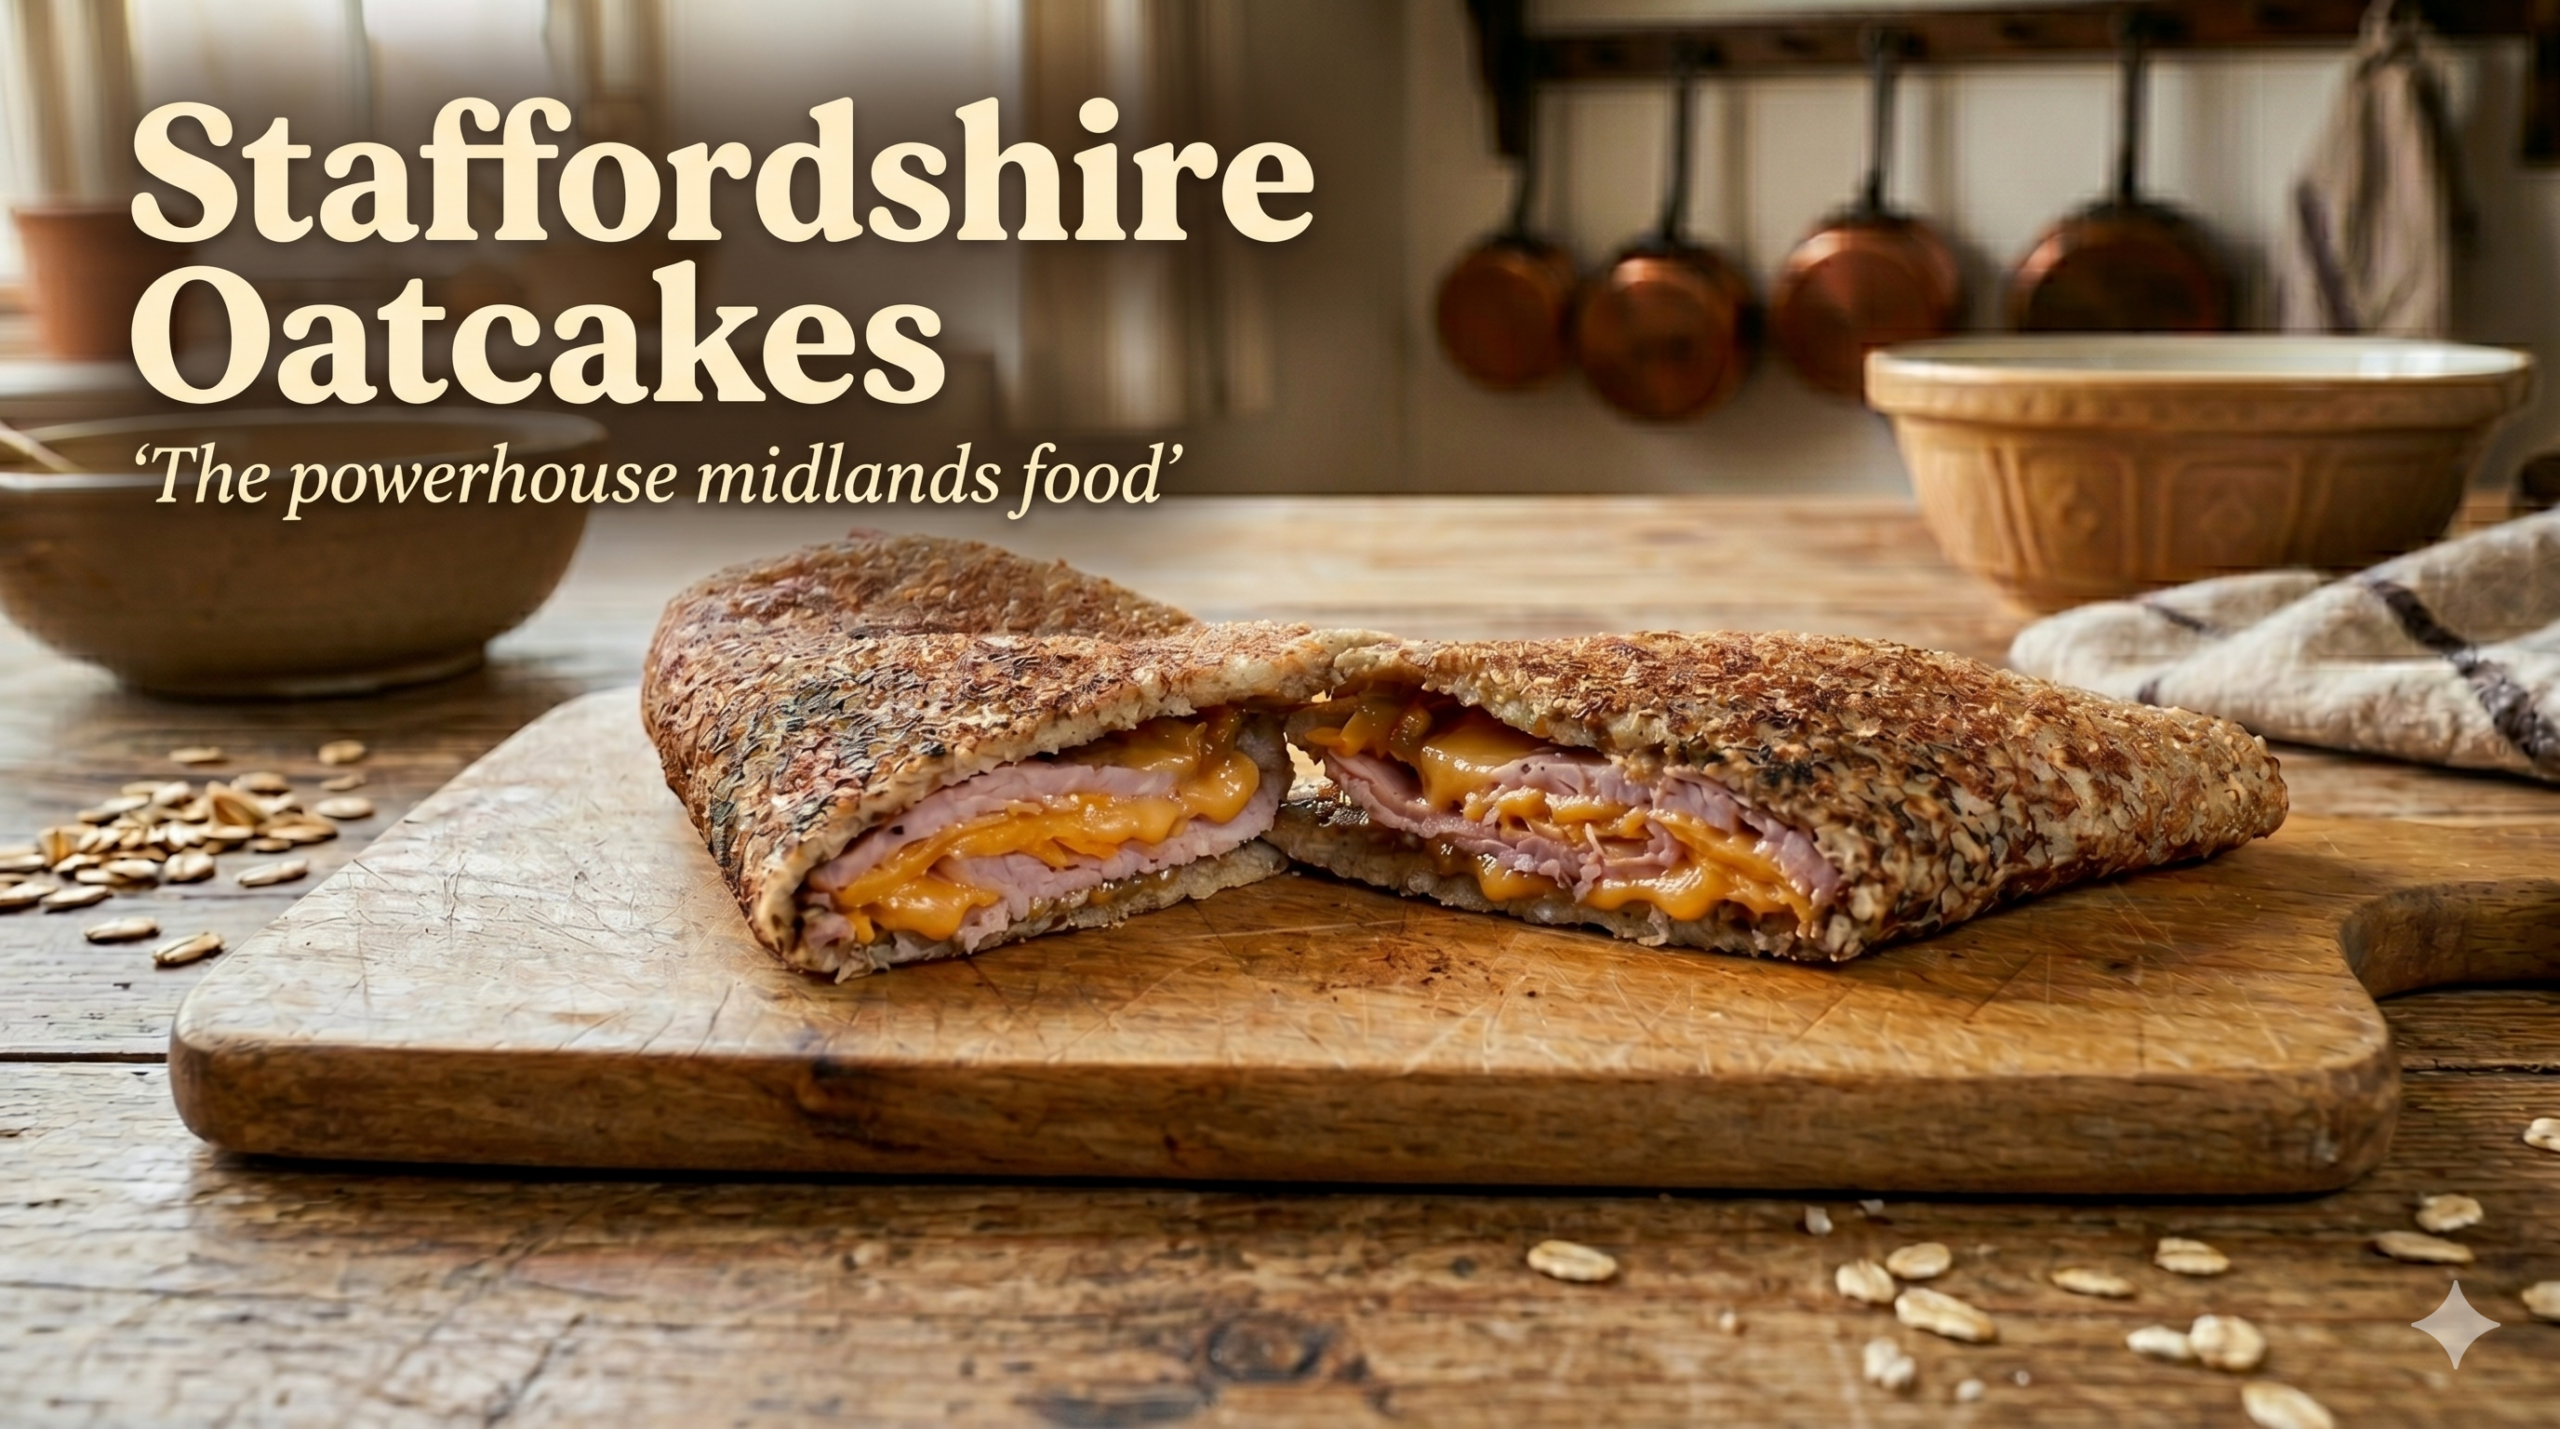
Staffordshire Oatcakes
Staffordshire Oatcakes
The Staffordshire oatcake is far more than just a breakfast item; it is a culinary artifact of the Industrial Revolution and a testament to the resourcefulness of the working class in the North Midlands. Often referred to simply as an "oatcake" by locals in Stoke-on-Trent and the surrounding Potteries, this savoury, yeast-leavened pancake holds a unique place in British food history.A Survival StapleThe origins of the oatcake are rooted in the difficult terrain and climate of the Pennine Moorlands. In the 18th century, wheat was expensive and difficult to grow in the cold, damp climate of the region, whereas oats flourished. Because of this, the oatcake became a primary source of sustenance for the working population. Unlike the crisp, hard oatcakes found in Scotland, the Staffordshire variety was developed as a pliable, soft, and hearty bread that could be filled, rolled, and eaten on the go.The Fuel of the PotteriesBy the 19th century, the oatcake had become the quintessential fuel for the workforce of the industrial Potteries. As thousands of men and women headed to the "pot banks" (pottery factories) and coal mines, the oatcake provided a portable, calorie-dense, and highly satisfying meal. It was the original "fast food" of the region, frequently sold directly from the windows of terraced houses, where families would cook batches on large, flat, iron plates known as baxtons (or bakestones) and sell them to workers passing by.Culinary EvolutionWhat made the oatcake so successful was its incredible versatility. Because of their mild, nutty flavour and robust texture, they could accommodate almost any filling. While they were historically eaten with simple, affordable ingredients—such as a scrape of lard, cheese, or even drippings from a roast—they evolved into the iconic breakfast staple known today: stuffed with bacon, melted cheese, and occasionally fried eggs or black pudding.The signature "lace" pattern—the small, crater-like holes that form on the surface during cooking—was not just aesthetic; it served a functional purpose, acting as a reservoir to hold melted cheese and fats, ensuring that every bite was moist and flavourful.A Living HeritageUnlike many other regional foods that have faded into obscurity, the Staffordshire oatcake has retained a fierce local identity. It remains a staple of the region, representing a direct, edible link to the lives of 19th-century industrial workers. Today, it stands as a proud example of forgotten British cuisine, celebrated for its simplicity, its unique texture, and its enduring ability to turn humble, store-cupboard ingredients into a world-class comfort meal.
Servings 10 people
Equipment
- 1 Non stick frying pan or blackstone
Ingredients
- 250 g Fine or medium ground oatmeal
- 200 g Strong bread flour
- 1 tsp fine salt
- 7 g Dried yeast
- 450 ml Warm milk
- 450 ml Warm water
Instructions
- Combine: Mix the dry ingredients in a large bowl.
- Activate: If using dried yeast, whisk it into a small portion of your warm water/milk mix and let it sit for 5–10 minutes until frothy.
- Mix: Combine the wet and dry ingredients. Whisk until smooth (it should be the consistency of thin, frothy double cream).
- Proof: Cover and leave in a warm place for about 1 hour until bubbly, or—for a deeper, more traditional fermented flavour—leave it in the fridge overnight.
- Cook: Heat a heavy-bottomed, non-stick frying pan (or a griddle/baking stone if you have one) over a medium-high heat. Lightly grease with a little lard or bacon fat.
- Ladle: Pour in a ladleful of batter. Swirl the pan to ensure an even, thin layer (about 2-3mm). The "Lace": Cook until the surface is dry and covered in small, "lacy" pockmarks.
- Flip: Carefully turn the oatcake over and cook for another minute until golden.
- Serve: Traditionally, place a handful of grated mature cheddar and some cooked bacon on one half, fold it over, and let the residual heat melt the cheese before serving.